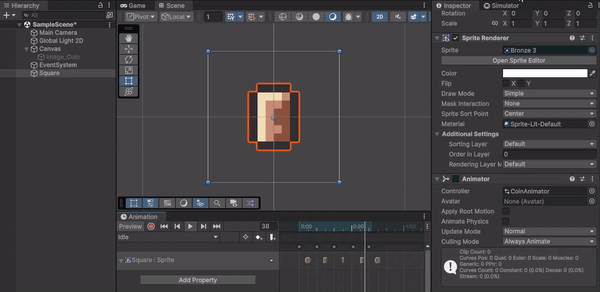
ES6+

ECMAScript 6부터의 버전에서는 자바스크립트 언어에 여러 유용한 기능들이 추가되었다. 


이 중에서도 특히 중요한 템플릿 리터럴, 디스트럭처링 할당, 스프레드 연산자와 나머지 매개변수, 모듈화에 대해서 정리한다.


템플릿 리터럴 (Template Literals)

템플릿 리터럴은 백틱을 사용하여 문자열을 작성하며, 문자열 내에 표현식을 포함할 수 있는 기능을 제공한다.


기본 사용법

const name = 'Bak';
const greeting = `Hello, ${name}!`; // 표현식 ${}을 사용
console.log(greeting); // "Hello, Bak!"


${} 표현식을 사용해서 문자열 내에서 직접 변수의 값에 바로 접근할 수 있다.


여러 줄 문자열

템플릿 리터럴을 사용하면 여러 줄에 걸쳐 문자열을 작성할 수 있다.

const multiline = `This is
a string
that spans multiple lines.`;
console.log(multiline);


ES6 이전에는 문자열을 쓸 때 큰따옴표를 사용해야 했으며 백틱을 사용하게 되면 구문 오류(Syntax Error)가 발생한다.


그리고 이전의 자바스크립트는 한 줄로 작성된 문자열을 인식하기 때문에 여러 줄에 걸쳐 문자열을 작성하기 위해서는 줄 끝에 백슬래시를 사용하여 줄 바꿈을 나타내야 했다.


var multiLineString = "This is the first line \
This is the second line \
This is the third line";
console.log(multiLineString);
// "This is the first line This is the second line This is the third line"

// 또는 

var multiLineString = "This is the first line\n" +
                      "This is the second line\n" +
                      "This is the third line";
console.log(multiLineString);
// This is the first line
// This is the second line
// This is the third line


이런 방법들은 코드의 가독성을 떨어뜨릴 여지가 충분했다.


디스트럭처링 할당 (Destructuring Assignment)

디스트럭처링 할당은 배열이나 객체의 값을 개별 변수로 쉽게 추출할 수 있게 해주는 문법이다. 이는 코드를 더 간결하고 가독성 좋게 만들며, 특히 복잡한 데이터 구조를 다룰 때 유용하다. 


const numbers = [1, 2, 3, 4];
const [first, second, ...rest] = numbers; // 배열의 첫 두 요소를 추출하고 나머지는 rest에 할당
console.log(first); // 1
console.log(second); // 2
console.log(rest); // [3, 4]


객체 디스트럭처링

const person = {
    name: 'Bob',
    age: 30,
    job: 'developer'
};
const { name, age, job } = person; // 객체의 프로퍼티를 개별 변수로 추출
console.log(name); // 'Bob'
console.log(age); // 30
console.log(job); // 'developer'


중첩된 구조 디스트럭처링

const person = {
    name: 'Charlie',
    address: {
        city: 'New York',
        zip: '10001'
    }
};
const { name, address: { city, zip } } = person; // 중첩된 구조에서 프로퍼티 추출
console.log(name); // 'Charlie'
console.log(city); // 'New York'
console.log(zip); // '10001'


함수 파라미터에서 디스트럭처링

함수 파라미터에서 디스트럭처링을 사용하면 코드가 더 직관적이고 명확해진다.

function displayPerson({ name, age }) {
  console.log(`Name: ${name}, Age: ${age}`);
}

const person = { name: 'Bak', age: 25 };
displayPerson(person); // Name: Bak, Age: 25


디스트럭처링을 잘 활용하면 코드의 유지보수성을 높이고, 가독성을 개선하며, 실수를 줄이는 데 도움이 된다. 


스프레드 연산자 (Spread Operator)

스프레드 연산자('...')는 세 개의 점으로 표현된다.


배열이나 객체를 펼치거나, 함수의 나머지 매개변수로 사용할 수 있어 배열이나 객체를 보다 간결하고 직관적으로 다룰 수 있게 해 준다.


배열에서 스프레드 연산자

// 배열 복사
const arr1 = [1, 2, 3];
const arr2 = [...arr1];
console.log(arr2); // [1, 2, 3]

// 배열 결합
const arr1 = [1, 2, 3];
const arr2 = [4, 5, 6];
const combined = [...arr1, ...arr2]; // 배열을 펼쳐서 결합
console.log(combined); // [1, 2, 3, 4, 5, 6]


객체에서의 스프레드 연산자

// 객체 복사
const obj1 = { a: 1, b: 2 };
const obj2 = { ...obj1 };
console.log(obj2); // { a: 1, b: 2 }

// 객체 결합
const obj1 = { a: 1, b: 2 };
const obj2 = { c: 3, d: 4 };
const combinedObj = { ...obj1, ...obj2 }; // 객체를 펼쳐서 결합
console.log(combinedObj); // { a: 1, b: 2, c: 3, d: 4 }


배열이나 객체를 단순히 변수에 대입하는 것과 스프레드 연산자를 사용하여 복사하는 것은 중요한 차이가 있다.

변수 대입과 참조

자바스크립트에서 배열이나 객체를 변수에 대입할 때 실제로는 해당 배열이나 객체의 참조가 복사된다. 이는 두 변수가 같은 배열이나 객체를 참조하게 된다는 의미로 한 변수를 통해 배열이나 객체를 변경하면, 다른 변수에도 그 변경 사항이 반영된다.


나머지 매개변수 (rest parameters)

함수에서 가변 인자를 처리할 수 있도록 도와주는 기능이다. 이 기능은 보다 인자들을 유연하게 다룰 수 있게 된다.

function sum(...args) { // 나머지 매개변수로 모든 인수를 배열로 받음
    return args.reduce((total, current) => total + current, 0);
}
console.log(sum(1, 2, 3)); // 6
console.log(sum(4, 5, 6, 7)); // 22


나머지 매개변수를 사용하면 함수가 전달받는 인자의 수에 제한이 없어 특히 가변 인자를 처리해야 하는 상황에서 유용하다.

function concatenate(separator, ...strings) {
  return strings.join(separator);
}

console.log(concatenate(', ', 'Hello', 'World', 'JavaScript')); // "Hello, World, JavaScript"
console.log(concatenate(' - ', 'Learn', 'Code', 'Enjoy')); // "Learn - Code - Enjoy"


배열 메서드를 직접 사용할 수 있어 가변 인자를 처리하는 로직이 명확해져 가독성이 높아지고 가변 인자를 처리하기 위한 별도의 코드를 작성할 필요가 없어 중복 코드를 줄일 수 있다.


arguments 

전통적으로 자바스크립트에서는 arguments 객체를 사용하여 함수의 모든 인자를 접근할 수 있다. 하지만 arguments 객체는 배열이 아니기 때문에 배열 메서드를 직접 사용할 수 없어 추가적인 변환 작업을 필요로 한다.

function oldSum() {
  const args = Array.prototype.slice.call(arguments);
  return args.reduce((total, num) => total + num, 0);
}

console.log(oldSum(1, 2, 3)); // 6


반면 나머지 매개변수는 배열로 제공되기 때문에 배열 메서드를 바로 사용할 수 있어 더 직관적이고 간편하다.


모듈화 (Modules)

모듈화를 통해 코드를 여러 파일로 나눠서 관리할 수 있어 코드의 재사용성과 유지보수성을 높여준다.


모듈 내보내기/가져오기 (Export/Import)

모듈에서 함수를 내보내는 두 가지 방법이 있다. 


name exports

모듈에서 여러 개의 변수를 내보낼 수 있으며, 각 변수를 특정 이름으로 내보낸다. 가져올 때는 내보낸 이름을 사용하여 모듈을 가져와야 한다.

// math.js
export const pi = 3.14;
export function add(x, y) {
  return x + y;
}
export class Calculator {
  subtract(x, y) {
    return x - y;
  }
}


import

// main.js
import { pi, add, Calculator } from './math.js';

console.log(pi); // 3.14
console.log(add(2, 3)); // 5
const calc = new Calculator();
console.log(calc.subtract(5, 3)); // 2


name export의 경우 같은 이름을 가진 변수가 이미 사용 중이라면 이름 충돌이 발생하기도 한다. 이를 해결하기 위해서 as 키워드를 사용하여 별칭을 붙일 수 있다.

import { add as addNumbers } from './math.js';


default exports

모듈에서 하나의 기본 값을 내보낸다. 모듈당 하나의 default export만 가질 수 있으며 이름 없이 내보낼 수 있다.

// utils.js
export default function greet(name) {
  return `Hello, ${name}!`;
}


import

// main.js
import greet from './utils.js';

console.log(greet('Bak')); // Hello, Bak!


혼합 사용

하나의 모듈에서 named exports와 default export를 동시에 사용할 수 있다.

// module.js
export const pi = 3.14;
export function add(x, y) {
  return x + y;
}
export default function subtract(x, y) {
  return x - y;
}

// main.js
import subtract, { pi, add } from './module.js';

console.log(pi); // 3.14
console.log(add(2, 3)); // 5
console.log(subtract(5, 3)); // 2
728x90
반응형

DOM

DOM은 HTML 문서의 구조화된 표현이다. 웹 페이지의 각 요소는 객체로 표현되며, 이 객체들은 트리 구조를 형성한다. DOM을 통해 자바스크립트는 문서의 구조, 스타일, 콘텐츠를 동적으로 변경할 수 있다.


요소 선택

DOM 요소를 조작하기 위해서는 먼저 해당 요소를 선택해야 한다.

자주 사용되는 두 가지 방법으로 getElementById와 querySelector가 있다.


getElementById

getElementById 메서드는 문서에서 특정 ID를 가진 요소를 선택한다. ID는 문서 내에서 고유해야 한다.


const element = document.getElementById('myElement');
console.log(element); // 해당 ID를 가진 요소를 출력


querySelector

querySelector 메서드는 제공된 CSS 선택자에 매칭되는 첫 번째 요소를 반환하며 더 유연하게 요소를 선택할 수 있다.

const element = document.querySelector('.myClass');
console.log(element); // 해당 클래스를 가진 첫 번째 요소를 출력

const anotherElement = document.querySelector('#myElement');
console.log(anotherElement); // 해당 ID를 가진 요소를 출력


요소 조작

선택한 요소의 콘텐츠와 스타일을 변경할 수 있다. 

getElementById나 querySelector는 요소를 선택하는 방법에만 차이가 있을 뿐 선택한 요소는 동일한 프로퍼티를 통해 조작할 수 있다.


innerHTML 

innerHTML 프로퍼티는 요소의 HTML 콘텐츠를 설정하거나 가져온다. 요소 내부의 HTML 구조를 동적으로 변경할 수 있다.

const element = document.getElementById('myElement');
element.innerHTML = '<p>새로운 콘텐츠</p>';


style

style 프로퍼티는 인라인 스타일을 설정한다. 특정 요소의 CSS 스타일을 직접 변경할 때 유용하다.

const element = document.getElementById('myElement');
element.innerHTML = '<p>새로운 콘텐츠</p>';


classList

classList 프로퍼티는 요소의 클래스 목록을 조작하는 메서드를 제공한다. 이를 통해 클래스를 추가, 제거, 토글 할 수 있다.

const element = document.getElementById('myElement');
element.classList.add('newClass');
element.classList.remove('oldClass');
element.classList.toggle('activeClass');


이벤트 처리

DOM 요소에 이벤트를 처리하기 위해서는 addEventListener 메서드를 사용한다. 

const button = document.getElementById('myButton');
button.addEventListener('click', function() {
    alert('버튼이 클릭되었습니다!');
});


HTML 예제

간단한 HTML을 작성하고 요소를 가져와서 조작해 본다.


index.html

<!DOCTYPE html>
<html lang="en">
<head>
    <meta charset="UTF-8">
    <meta name="viewport" content="width=device-width, initial-scale=1.0">
    <title>Element Selection Example</title>
    <style>
        .highlight {
            background-color: yellow;
            color: red;
            font-weight: bold;
        }
    </style>
</head>
<body>
    <div id="content">
        <h1 id="header">Hello!</h1>
        <p class="paragraph">This is a paragraph.</p>
    </div>
    <button id="changeContent">Change Content</button>
    <button id="changeStyle">Change Style</button>
    <button id="toggleClass">Toggle Class</button>
    <script src="script.js"></script>
</body>
</html>


script.js

// 요소 선택
const header = document.getElementById('header');
const paragraph = document.querySelector('.paragraph'); // 클래스 선택자를 사용
const changeContentButton = document.getElementById('changeContent');
const changeStyleButton = document.getElementById('changeStyle');
const toggleClassButton = document.getElementById('toggleClass');

// 콘텐츠 변경
changeContentButton.addEventListener('click', function() {
    header.innerHTML = 'Content has been changed!';
    paragraph.innerHTML = 'The paragraph content has been changed!';
});

// 스타일 변경
changeStyleButton.addEventListener('click', function() {
    header.style.color = 'blue';
    paragraph.style.backgroundColor = 'lightgray';
    paragraph.style.padding = '10px';
});

// 클래스 토글
toggleClassButton.addEventListener('click', function() {
    paragraph.classList.toggle('highlight');
});


페이지 상태

HTML


Change Content 버튼을 클릭 시

OnClick Change Content Button


Change Style 버튼 클릭 시

OnClick Change Style


Toggle Class 버튼 클릭 시

Onclick Toggle Class


728x90
반응형

'Program Language > JavaScript' 카테고리의 다른 글

JavaScript #15 비동기 자바스크립트  (0) 2024.07.23
JavaScript #14 ES6+ 문법  (4) 2024.07.23
JavaScript #11 함수  (0) 2024.07.23
JavaScript #10 조건문과 반복문  (1) 2024.07.23
JavaScript #9 데이터 타입  (9) 2024.07.22

객체 (Object)

객체는 자바스크립트에서 데이터를 구조화하고 저장하는 방식 중 하나로 키와 값 쌍의 집합으로 구성된다. 이 키-값 쌍을 통해서 다양한 테이터와 기능을 하나의 단위로 묶어 관리할 수 있다.


특징

키-값

키는 문자열 또는 심볼이어야 하며 값은 어떠한 데이터 타입도 가능하다. 만약 키에 숫자를 입력할 경우 자동으로 문자로 변환된다.


중첩 가능

객체의 값으로 또 다른 객체를 가질 수 있다. 이를 통해 복잡한 데이터 구조를 표현하는 것이 가능하다.


동적 속성 추가/제거

객체는 생성된 이후에도 속성을 동적으로 추가하거나 삭제할 수 있다.


생성 방법

1. 객체 리터럴

가장 일반적인 객체 생성 방법으로 중괄호를 사용하여 키-값 쌍을 정의한다.

const person = {
    name: 'Bak',
    age: 25,
    greet: function() {
        console.log('Hello, my name is ' + this.name);
    }
};


2. 객체 생성자

new Object() 구문을 사용하여 객체를 생성할 수 있다. 이후 점 표기법 또는 대괄호 표기법을 사용하여 속성을 추가한다.

const person = new Object();
person.name = 'Bak';
person.age = 25;
person.greet = function() {
    console.log('Hello, my name is ' + this.name);
};


3. 생성자 함수

특정 구조를 가진 객체를 반복해서 생성할 때 유용하다.

function Person(name, age) {
    this.name = name;
    this.age = age;
    this.greet = function() {
        console.log('Hello, my name is ' + this.name);
    };
}

const alice = new Person('Bak', 25);


4. 클래스(ES6 이후)

클래스를 사용하면 객체 지향 프로그래밍의 패턴을 쉽게 구현할 수 있다.

class Person {
    constructor(name, age) {
        this.name = name;
        this.age = age;
    }
    greet() {
        console.log('Hello, my name is ' + this.name);
    }
}

const alice = new Person('Alice', 25);


객체 사용법 

const game = {
    company: 'Bethesda',
    title: 'Fallout',
    year: 1997
};

// 속성 접근
console.log(game.company); // 'Bethesda'
console.log(game['title']); // 'Fallout'

// 속성 수정
game.year = 2008;
console.log(game.year); // 2008

// 속성 추가
game.series = 'Fallout : New Vegas';
console.log(game.series); // 'Fallout : New Vegas'

// 속성 삭제
delete company.title;
console.log(company.title); // undefined


배열 (Array)

배열은 자바스크립트에서 여러 개의 데이터를 순차적으로 저장할 수 있는 자료구조이다. 동일한 타입 또는 서로 다른 타입의 데이터를 모두 저장할 수 있으며 각 데이터는 인덱스로 접근할 수 있다.


특징

인덱스 기반

배열의 각 요소는 0부터 시작하는 인덱스를 통해 접근할 수 있다.


동적 크기

자바스크립트의 배열은 동적 크기를 가지며, 요소를 추가하거나 제거할 수 있다.


다양한 데이터 타입

배열의 요소는 숫자, 문자열, 객체, 다른 배열 등 어떤 데이터 타입도 될 수 있다.


배열 생성 방법

1. 배열 리터럴 

가장 일반적인 배열 생성 방법으로 대괄호를 사용하여 배열 요소를 정의한다.

const numbers = [1, 2, 3, 4, 5];
const mixedArray = [1, 'two', {three: 3}, [4, 5]];


2. 배열 생성자

new Array() 구문을 사용하여 배열을 생성할 수 있다.

const numbers = new Array(1, 2, 3, 4, 5);
const emptyArray = new Array(10); // 길이가 10인 빈 배열 생성


배열 사용법

const fruits = ['apple', 'banana', 'cherry'];

// 요소 접근
console.log(fruits[0]); // 'apple'
console.log(fruits[1]); // 'banana'

// 요소 수정
fruits[1] = 'blueberry';
console.log(fruits[1]); // 'blueberry'


인덱스로 배열의 요소에 접근하여 사용할 수 있다.


배열 메서드

자바스크립트 배열은 다양한 메서드를 통해 요소를 추가, 제거, 탐색, 변형할 수 있다.


1. push

push 메서드는 배열의 끝에 하나 이상의 요소를 추가하고 배열의 새로운 길이를 반환한다.

const fruits = ['apple', 'banana'];
let len = fruits.push('orange');
console.log(len); // 3
console.log(fruits); // ['apple', 'banana', 'orange']

.

2. pop

pop 메서드는 배열의 마지막 요소를 제거하고 그 요소를 반환한다.

const fruits = ['apple', 'banana', 'orange'];
const lastFruit = fruits.pop();
console.log(fruits); // ['apple', 'banana']
console.log(lastFruit); // 'orange'


push & pop 사용 예제

const fruits = ['apple', 'banana'];

// push: 배열 끝에 요소 추가
fruits.push('cherry');
console.log(fruits); // ['apple', 'banana', 'cherry']

// pop: 배열 끝의 요소 제거
const lastFruit = fruits.pop();
console.log(fruits); // ['apple', 'banana']
console.log(lastFruit); // 'cherry'


3. map

map 메서드는 배열 내의 모든 요소에 대해 제공된 함수를 호출한 결과로 새로운 배열을 생성한다.

const numbers = [1, 2, 3, 4, 5];
const doubled = numbers.map(num => num * 2);
console.log(doubled); // [2, 4, 6, 8, 10]
const numbers = [1, 2, 3, 4, 5];
const squared = numbers.map(num => num * num);
console.log(squared); // [1, 4, 9, 16, 25]


4. filter

filter 메서드는 주어진 함수의 테스트를 통과하는 모든 요소를 모아 새로운 배열로 반환한다.

const numbers = [1, 2, 3, 4, 5];
const evens = numbers.filter(num => num % 2 === 0);
console.log(evens); // [2, 4]


5. reduce

reduce 메서드는 배열의 각 요소에 대해 주어진 reducer 함수를 실행하여 단일 값을 반환한다.

const numbers = [1, 2, 3, 4, 5];
const sum = numbers.reduce((accumulator, currentValue) => accumulator + currentValue, 0);
console.log(sum); // 15


reduce는 배열의 각 요소를 순회하며, 콜백 함수의 결과를 누산 하여 단일 값을 생성한다. 여기서 

(acc, curr) => acc + curr는 콜백함수로 두 개의 주요 인수를 받는다.


acc : 이전 콜백에서 반환된 값으로 이전 인덱스까지 누산 된 값

curr : 현재 순회 중인 인덱스의 요소


(콜백함수), 0 : 0이 초기값으로 이 값을 시작으로 요소의 값들이 누산 되기 시작한다.


공식 문법은 다음과 같다.

arr.reduce(callback(accumulator, currentValue, currentIndex, array), initialValue)


실제 필요한 인수들이 다양한 방식으로 표기가 가능한데 그 이유는 자바스크립트의 함수 인수 처리 방식 때문이다.


자바스크립트에서는 함수가 호출될 때 정의된 인수보다 더 많은 인수가 전달되면 무식하고, 더 적은 인수가 전달되면 undefined로 처리한다.


따라서 reduce 메서드에서 필요한 인수만이 알아서 사용된다.


따라서 생략형 콜백에서는 첫 번째와 두 번째 인수만 사용하며 두 값을 합한 결과만 리턴하기로 한다.


이 과정이 반복되면서 전체 요소의 합산이 되는 것이다.


모든 인수를 적용해서 호출하면 다음과 같다.

const numbers = [1, 2, 3, 4, 5];

const sum = numbers.reduce((accumulator, currentValue, currentIndex, array) => {
    console.log('Accumulator:', accumulator);
    console.log('Current Value:', currentValue);
    console.log('Current Index:', currentIndex);
    console.log('Array:', array);
    return accumulator + currentValue;
}, 0);

console.log('Sum:', sum); // Sum: 15


인수 (accumulator, currentValue, currentIndex, array) => {콜백 함수} : 요소의 누산 값을 반환

auccumulator : 누산값

currentVlaue : 현재 요소값

currnetIndex : 현재 인덱스

array : 참조 배열


728x90
반응형

+ Recent posts